 When the Queen Enchantress came this past weekend she noticed I was missing two very important things if I was really going to try my hand at this sewing thing. I didn't have a pin cushion, or a seem ripper! If you know me an ordinary pin cushion and seam ripper are just way to boring, so after searching for some ideas I found this one I took it a little further making it more my own!:) Enchantress #3 sent me these cute little tins the other day and I thought they would be perfect!
Thursday, April 30, 2009
Not your Mommas pin cushion
 When the Queen Enchantress came this past weekend she noticed I was missing two very important things if I was really going to try my hand at this sewing thing. I didn't have a pin cushion, or a seem ripper! If you know me an ordinary pin cushion and seam ripper are just way to boring, so after searching for some ideas I found this one I took it a little further making it more my own!:) Enchantress #3 sent me these cute little tins the other day and I thought they would be perfect!
Pin board! (Super easy & quick)


 Wha-LA! A hidden place to keep all my reminders, phone numbers, notes and inspiration. I wanted to stack two on each door, but the insides weren't flush, so I just have another one on the opposite cabinet. It works for me. Does anyone have any ideas on what to do with my other 2 left over tiles?
Check out this cute grocery list my kindergartner made for us during a family council on food storage. I love his handwriting!
~JJ

Inspiration for this project came from here.
Monday, April 27, 2009
Modified Hair Bow Holder

A super easy, space saving hair bow holder.
~BC
The Queen Enchantress comes to town
 Enchantress 1 and Enchantress 3 were both so jealous that the Queen Enchantress (Momma JoRaye) got to come visit Enchantress 2 this past weekend! Oh how I wish I had paid more attention when she tried to teach us to sew. Momma JoRaye is an amazing seamstress and can sew anything!
This is a picture of our Great Grandmothers sewing machine, that our Mother uses to sew. This lovely has sewn more prom dresses, costumes, baby blankets, etc, that can be listed. I think she needs to be named, any ideas?
Wednesday, April 22, 2009
simple felt flower picture tutorial
Cheap, Chic, Wall Art
 I got these frames last fall 90% off at my favorite store Hobby Lobby. I loved the detail, but not the hideous color, so what did I do? Spray paint the little lovelies of course! I have been waiting to do something fun with them.
 I found these cute metal letters at Hobby Lobby today 50% off. Yes, I am a Hobby Lobby addict and am there at least 3 times a week. I am not ashamed to admit it!
 This is the final product! I added some cute scrapbook paper, glue gunned the letters on, and I love how they turned out! One as a thank you gift for a friend, and one for me of course!
 ~SS
Tuesday, April 21, 2009
Pink and Purple Polka Dot Party


Necco candies and yogos make yummy polka-dots!
The snacks. Purple grapes, round peanut butter pretzels, mini pringles, pink m&m's and more yogos. We didn't serve lunch but if you wanted to, mini pizza's would be cute.
The craft table. Bingo markers make perfect polka dots. Pom poms, round jewels, and circle stickers keep kids busy for 15-20 minutes plus give them something to take home with their goodie bag.
Goodie bags (found at Target) included; bubbles, play-doh, sidewalk chalk(with dots on it), yogos, purple polka dot hair bows(for girls) and little tonka trucks (for boys). If I hadn't of found these bags I would have used plain white gift bags and had the kids decorate their own!

I wanted to use Twister but we didn't have time. I also wanted to have fun kids "polka" music playing that I didn't get around to finding. I know The Backyardigans has a fun "Dance to the Wormin' Polka" song.
Happy Polka-dotting!!
~BC
Monday, April 20, 2009
Kitchen cabinet re-do with paint & new hardware.
My kitchen cabinets have been bothering me for a long time. Pricing out new ones was too expensive for our budget, so I began to look for other alternatives. After finding inspiration and lots of advice from the gracious Katie at Clean and Classic Interiors,
Here are the products we used. The paint is called Cabinet Coat by Insl-x in the color Almond and the glaze we used was from Lowe's in Mocha. We did NOT prime or sand. This paint is self-settling and dries amazingly smooth. It was very easy to work with and we did our entire kitchen (2 coats) with less than one gallon. *The paint was about $46 a gallon but SO worth the price. Especially when you nix the sanding and priming steps!

So, on to the pictures. Warning, my photography skills and the lighting don't do them justice, & there are a lot of pictures.
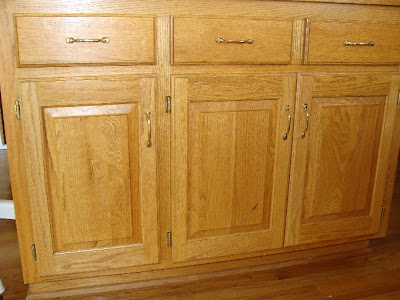
BEFORE with the lovely gold hardware:


I am so pleased with how these turned out. I wanted an aged off-white look and the almond with the mocha glaze turned out just as I had hoped, so...drum roll please...
AFTER with the glazing, new hinges and hardware in oil-rubbed bronze.


hair bow holder
 Those who know me, know that I am a little obsessed with hair bows!:) They were starting to take over my house, so hubby and I came up with this easy solution. All you need is an art canvas, fabric, cute ribbon (I used leopard print, I love me some animal print!) and a staple gun! We just covered the canvas with the fabric, staple gunned to the back, then staple gunned the ribbon. Quick and easy! I am embarrassed to say I need to make some more! A little girl can never have to many hair bows right?:) S.S.
Sunday, April 19, 2009
frame it!
Saturday, April 18, 2009
clip boards
 I know everyone in blogging land has made these, but I thought I would post my version. Isn't mod podge an amazing thing? My husband says we should buy stock in it!:) All I did was mod podge cute paper on cheap clipboards, used a sharpie to stencil my daughters teachers initials on the bottom, and tied curled ribbon at the top. Her teachers LOVED them, and I do too! I will have to post next about a file cabinet I mod podged- yeah you heard me right, I modge podged a filing cabinet I got at a garage sale for 5 bucks. Am I crazy?
Friday, April 17, 2009
I get by with a little help from my "friend"
Here is our before:


Here is my light fixture after meeting my friend O.R.B.
It looks kinda black in the picture, but it actually has a nice metallic sheen which matches our new cabinet hardware perfectly.


.JPG)

.JPG)


